Hi Everyone, I hope you will stay with me through a mountain of photos to get this done....it makes it easier for you to see what I have done, and hopefully you will be able to make a lovely rose!!
Using the medium punch (3cm dia) cut 9 flowers.
Separate into 3 piles. These will be bottom layer, middle layer and the bud layer (top)
Starting with the middle layer, fold the first petal towards the centre of the flower and then straighten back out again. Repeat with all 5 petals.
Now taking a bone folder (scorer, anything you have is fine, I find this works for me).
Put the edge of your tool under the petal at the join to the centre and drag towards the outside edge of the petal. (Same motion as your would use for curling ribbon.)
You will have a nice little curl on your petal. Repeat with all petals.
There you go, see how it lifts the petals at the centre and makes them drop down at the edge?
Now put your finger at the outside edge of the petal and make that curl even more defined. Press it down to curl it more.
Like this, but don't bend it right over and put a crease in him.
Just like this, and then repeat with all 5 petals.
There his is all done. Now repeat this with another 2 flowers.
Now we will work on the bottom layer. Take 3 flowers for this.
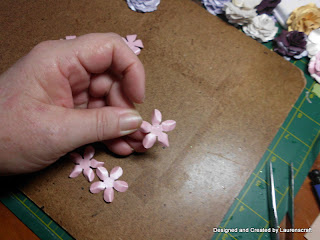
Now holding the flower in the centre, place the thumb and forefinger of your other hand on either side of the outside edge of the petal and squeeze together until you squeeze a creased point on the outside of the petal.
See how this is for the lower petal? Repeat with all 5 petals and the 3 flowers. Now you have your bottom layers done.
Now for the bud top of your rose. Take 3 flowers and a pair of tweezers, straight or offset, whatever you have. Hold the petal of the flower as above.
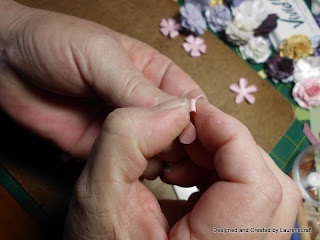
Now squeeze the petal around the tweezers.
See how it retains its curl? Now repeat with the other 4 petals and the other 2 flowers, so you have 3 like this.
Now you will have 3 flowers that are pinched to a point. Three Flowers that are curled down at the end, and 3 that are curled inwards.
Now taking the 3 pinched to a point ones.
Glue one on top of another, offsetting each petal so that you see the lower one between the upper one.
See how you can see all the petal of both flowers?
Now add the third layer, offsetting it again.
Do the same with the middle layer flowers, (the curled down ones)
Sometimes it is easier to press down with something. I find my fingers are a little big at times.
Now add the middle stack to the bottom stack and hold together until the glue takes.
This is what you should have by now.
Now take the bud parts, the 3 top layer flowers. I have used Glossy Accents, but I usually use white glue. You will see that I have coated each petal for this.
Now fold the petals up, I try to have the circle of petals going in the same inside to outside direction, if you look closely you will see what I mean, but it does not matter if this is not so, it will still work.
Now bring your bud tighter by pressing it closed or rolling it in your fingers. (Whatever works for you)
And tighter still. You will need to hold this one for a while. I have not worked out a holding system except for between my fingers.
Done that one, now for the next. Add the glue again to the centre and the lower parts of the petals.
Pop the little bud in the centre.
Now fold up the petals. Again you will have to hold it till the glue takes. Then add the 3rd petal in the same manner, but not as tight.
Now this is the bottom and middle layers.
Now carefully lift the petals to 'fluff' it up a little.
Glue on the bud part. Isn't it beautiful??? Now I take a paintbrush (a disposable lipstick brush) and some watered down white glue and paint my rose.
Then carefully sprinkle some clear (you know the one that takes on any colour under it) glitter.
There ya go, he is so cute. Lisa I hope you like this.
Lisa is my friend from SCS. She is Canadian and I love her. She gives me such wonderful praise for my work and she does such beautiful work herself. She is an inspiration. Why not go visit her blog Crafting Cottage it is well worth the visit.
Now here is a card I did with these roses, and I even made a small one with the small punch, but only 4 or 5 layers.
Now I hope you make some roses for yourself. Email me if you need more help.
LoveLaurenxx


